[ NARRATOR SHOWING THE APP MAIN VIEW, NO FILTERS ARE SET ]
- Hi, my name is [Narrator tells his name], and today I’m gonna show you how you can easily add or remove a variant for some subset of our products or even all of them on Shopify store using the “ Excel Like Product Bulk Edit ” application. This is actually a very common need. For example , you supplier may in some moment offer a new size or color for some set of products and you may need to add it to like 300 products. This may take a long time using the default interface. Also you can miss or make mistakes in that whole process easily. Suppliers may stop producing some size or color and you may want to remove that completely.
{Adding variant}
- I will now explain to you how to add a variant to some set of products.
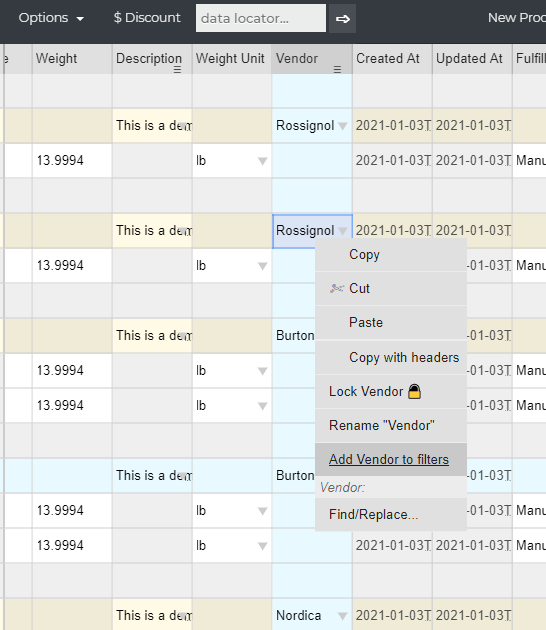
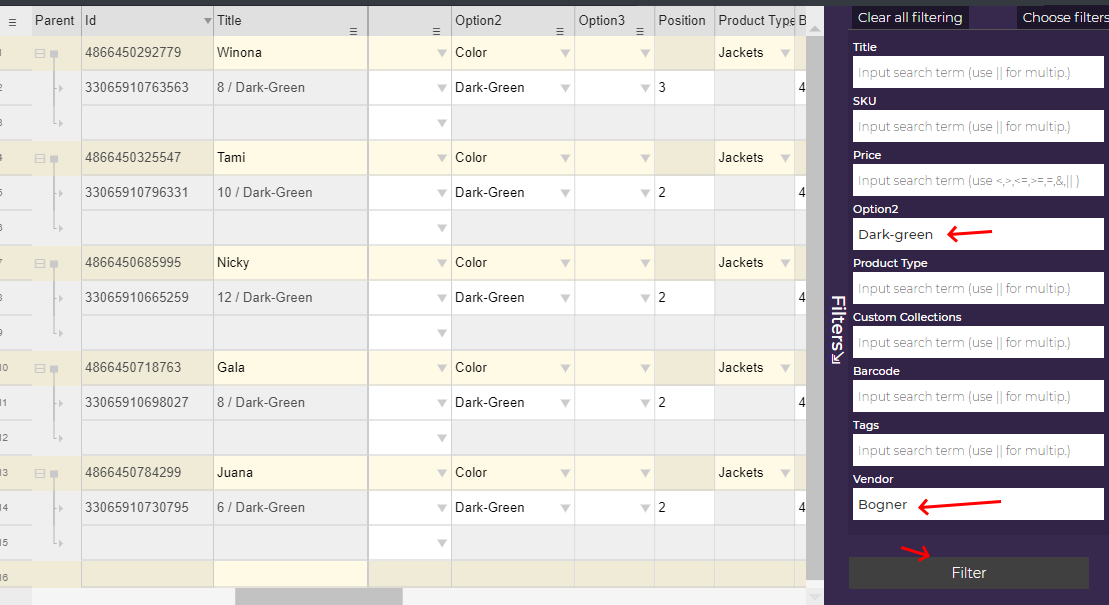
Let’s say we want to add a new color “Dark-green” , to products we sell provided by a certain vendor. First , we will filter only those products. In the filter panel, in the vendor field , we just enter the name of our vendor [NARRATOR enters “Bogner” in the Vendox box of the filter panel and clicks FILTER BUTTON ] . If you don’t have a vendor field displayed here, you can add it weather by using the column context menu [NARRATOR right-clicks some cells in the vendor column to show “Remove Vendor from Filters” option] . I n case you don’t see it this option will say “Add Vendor from Filters” [NARRATOR closes column context menu not activating any of the options (click anywhere outside)].
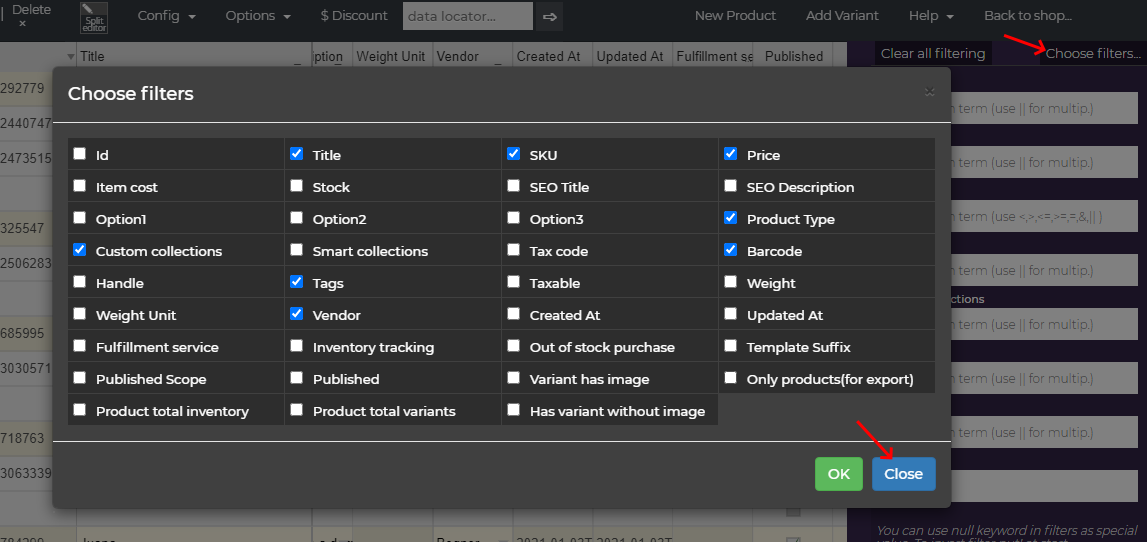
We can also use the “Choose filters” option [NARRATOR clicks on “Choose filters” to show filter selection options. NARRATOR closes dialog.] .
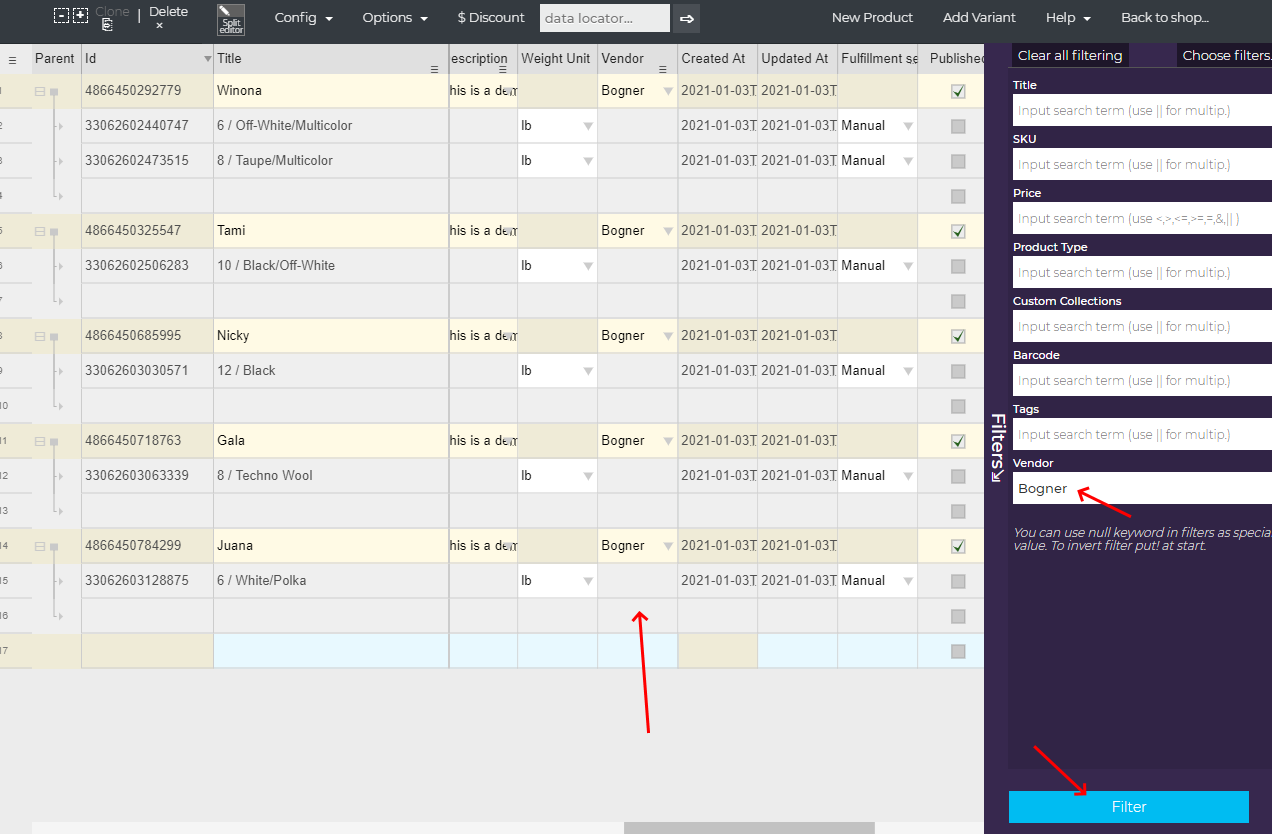
Ok , so let’s filter [NARRATOR clicks on “Filter” button. NARRATOR scrolls the grid to show Vendor column] We see that now we have only products whose vendor is “Bogner” displayed.
Now when we have an , isolated set of products we want to modify, we will start Variant add dialog. It is activated for the tom menu, in Options, “Add variant to all filtered products” [NARRATOR opens the option Options->Add variant to all filtered products] .
First parameter here is drop-down [NARRATOR expands “How to set other properties....” drop-down] , that lets us specify what variant should app use for other variant properties, besides identifying options.
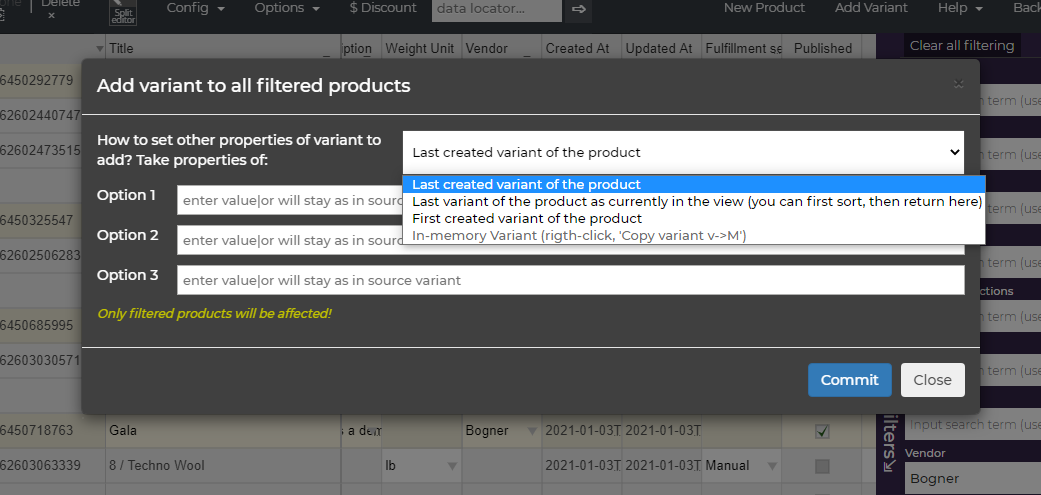
We can use the “last created variant of products” in which case the newest variant of a particular product will be used as a model.
We can also use the first created variant to use odlest product variant instead.
Option “Last variant of the product as currently in the view (you can first sort, then return here)” is probably most useful, and you will probably use it in most cases. It will respect current ordering in datagrid , and use the last variant as seen for products in the view. We can close this dialog, and order by some other column [NARRATOR closes Add Variant dialog. NARRATOR clicks on some column header in greed to change ordering. NARRATOR AGAIN OPENS THE Add Variant dialog] then return here.
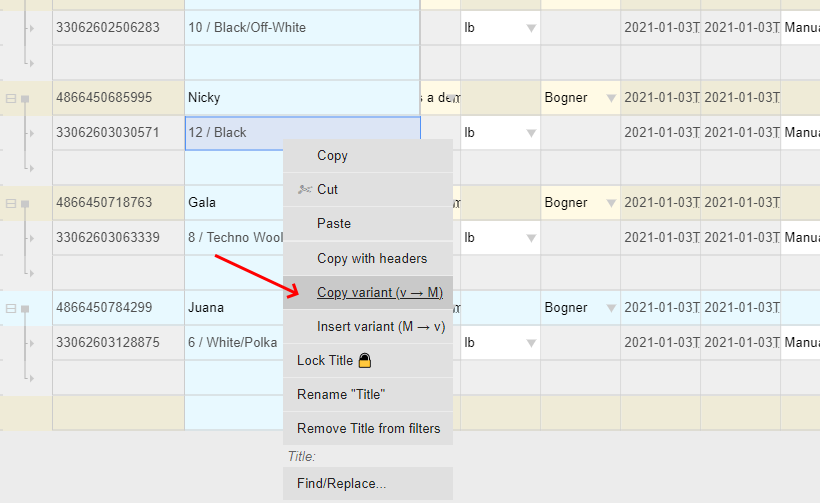
Last option that is currently grayed out is In-memory Variant. Since the app has another feature of copy pasting the whole variant, we can use a variant that is currently in the memory as a model. This is useful, because variants picked for a model when using some of the other 3 options may have price, inventory level or some other option we don’t want to replicate the value of. We can pick a particular variant and use it for all products as some starting point. To copy a variant to memory [NARRATOR closes Add Variant dialog] we can right click on some variant, and option “Copy v->M” [NARRATOR select some cell of some variant. NARRATOR right-clicks with the mouse to get the context menu. NARRATOR runs “Copy v->M”. NARRATOR opens Add variant dialog. NARRATOR expands drop-down again. AFTER SHOWING NARRATOR LEAVES “Last created variant of product” option selected] .
We see that this option is no longer grayed out as we now have a variant in memory.

Ok , major things about variants are options that identify our variant and here we have inputs for each of them. Shopify allows exactly 3 options per variant. . We can have variants with only one option defined, variants with two options defined or all 3 options defined. It is important that their combination is unique for a product, and if used for a product all its variants need to have value for it.
We see that hint for all 3 boxes sayes “enter value|or will stay as in the source variant” . This means that if we for example have a product with variants having two options, we may keep the value of Option 1 as in the model variant we selected, and only use the value specified for Option 2 , when adding our new variants. Since Color is defined in Option 2 ,for all of these products we will do so now. I will enter the color of new variants in Option 2 box [NARRATOR enter “Dark-Green” in Option 2 of Add variant dialog] . Ok , we are ready, I will now click “Commit” to add our new variants [NARRATOR clicks “Commit” button, NARRATOR waits a while ] . We see our variants are added.

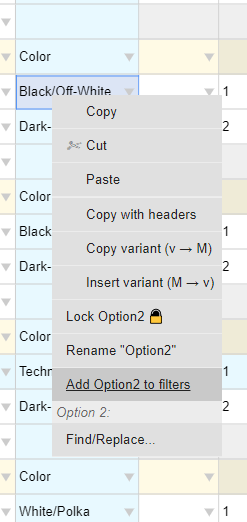
We can further use other mass options to set data we want. We can filter only them [NARRATOR adds Option 2 to filters by using the column context menu. NARRATOR enters Dark-green for Option 2 and clicks FILTER button] .
{Removing variant}
[NARRATOR REMOVES VALUE FROM Option 2 filter box. NARRATOR clicks FILTER button ]
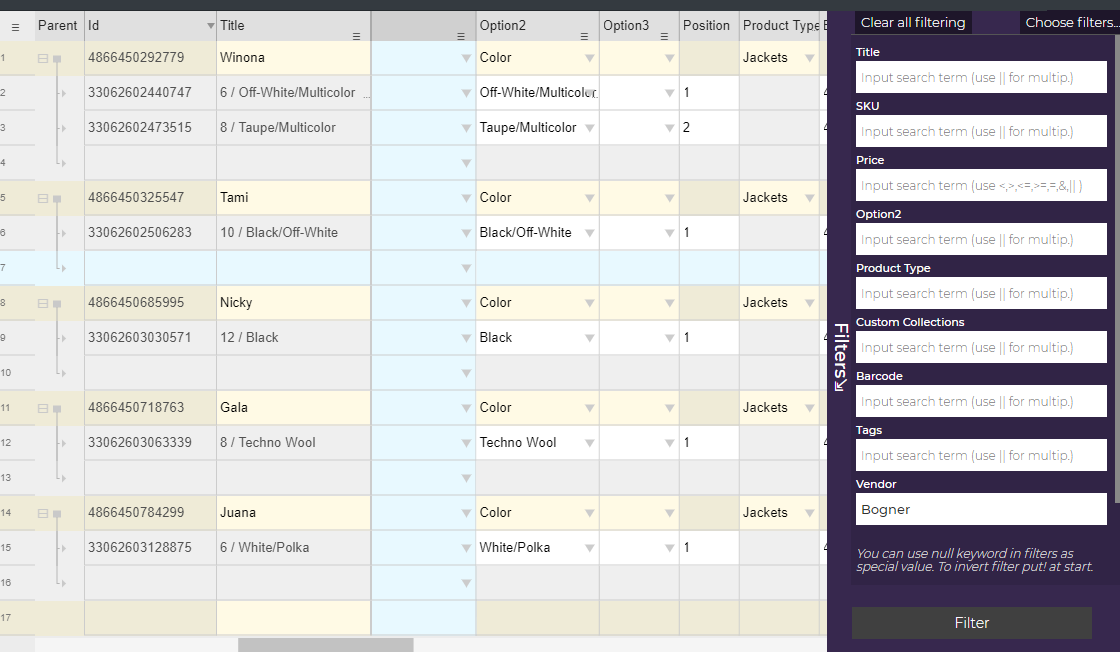
We can also remove variants from products if we want. We can filter them out like we have now for Dark-Green of vendor Bogner. And use the option Options -> Delete only filtered variant. [NARRATOR AGAIN ENTERS Dark-green for Option 2 and clicks FILTER button. NARRATOR run Options -> Delete only filtered variant, confirm] . We see now our variants are removed [NARRATOR REMOVES VALUE FROM Option 2 filter box. NARRATOR clicks FILTER button ] .
That's all for today. Thank you for watching my video. Have a nice day!